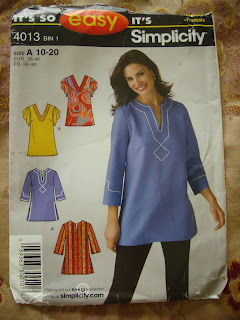
Well, let me tell you how I got there. First, I used the sewing pattern for a modestly fitting tunic and I just elongated it to the length that I needed. I also extended the sleeves and changed the neck line.
I then decided to go with the biggest size on the pattern because I wasn't sure how the end result would fit and this way I cut always take some material in. I need to mention here that I used a lot of Youtube videos, which show you the process step by step and are very easy to understand.
Here is my final result. I absolutely love the color of it, which is dark chocolate that matches pretty much anything. I also added a pocket on the side, because I always have to have my phone and keys with me. On the neckline I simply used the HeatnBond tape (it took me only 5 minutes).
In the conclusion, it took me $20 to buy the material at Hancock fabrics, which is 80% polyester and 20% rayon. It feels so comfortable, light and is not see through! I feel like it is very simple and perfect for me for everyday outings. But of course I still want the dressier ones that I saw online :) Alhamdulillah.


No comments:
Post a Comment